
| Video #: T1039 | Duration: 10:37 | File Size: 47.1 MB | File Type: MP4 |
| Description:
Demonstrates how to measure insertion loss of a multimode fiber link with a ZOOM 2 / Dual OWL multimode test kit. Model #: KIT-Z2-D2sc KIT-Z2-D2st NOTE: ignore the steps referring to 1300nm for the following test kits: KIT-Z2-D285sc KIT-Z2-D285st |
|||
|
Watch the full video above, or watch each individual step separately below. |
|||
|
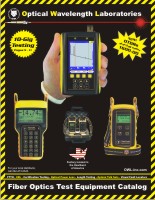
KIT-Z2-D2xx INSERTION LOSS TEST PROCEDURE The ZOOM 2 / Dual OWL multimode test kit offers fiber optic professionals a cost-effective option for testing multimode fiber links at 850 and 1300nm. This test kit includes:
The Dual OWL multimode light source contains 850nm and 1300nm LEDs which can be used to test both 62.5 and 50 micron multimode fibers. The user has a choice of either an SC or ST light source connector option. This connector option, along with patch panel connector style and fiber type, is important to note when determining test cable configuration. Patch cables are not included, so for assistance with choosing patch cables, please watch our helpful “Choosing Patch Cables” video. Choosing Patch Cables To enable this kit to test singlemode fibers, a separate singlemode source would be required. Otherwise, quad-wavelength test kits are also available that include both multimode and singlemode sources. Contact OWL’s sales department for more information. Contact OWL The typical application for this test kit is to measure the insertion loss of multimode fiber links at 850 and/or 1300nm. When compared to a known fiber optic link budget, these optical loss measurements become helpful when determining if the fiber link is “good or not”. A typical link configuration is one where the multimode fiber cable is installed between patch panels on both ends of the fiber link, or between a cross-connect and the user equipment outlet. This link configuration enables the fiber technician to utilize the industry recommended one-jumper reference method to set the optical reference (in other words “zero out” the test equipment). This method provides the greatest measurement accuracy by eliminating the measurement error introduced by adapters that normally would be present in two-jumper or three-jumper reference methods. Other link configurations, such as a patch panel on only one end, or no patch panels at all, may require the technician to adjust their test procedures accordingly. This diagram shows a list of accessories to accomplish the loss measurements for both 850 and 1300nm wavelengths. Six items are required, three patch cables, two mandrels, and an optional mating sleeve. Each the test cables must have the same core diameter as the fiber under test. Two of the cables must be wrapped around a mandrel corresponding to the core diameter. These mandrel-wrapped cables are for the light source ports. The third patch cable is for the power meter side. In most cases, testing with a mandrel-wrap is sufficient, but if encircled flux compliance is required, then an appropriate encircled flux mode controller cable must replace each of the mandrel-wrapped reference cables. For ease of demonstration, we will assume SC adapters are installed in the patch panels. Therefore, this means that the 2.5mm universal adapter cap needs to be installed on the ZOOM 2, and the patch cables and mating sleeve will all be SC-SC. With both units together in front of you, press the power button on both units. The ZOOM 2 power meter will power up to show the wavelength and unit settings that were in use when the meter was last powered off. The power reading shown on the LCD will show either LO if the dustcap is on the detector port, or a very low ambient light level if the dustcap is not installed. The Dual OWL will power on to 850nm by default. Connect one of the mandrel-wrapped reference cables (1) to each light source port as shown. Please note that if encircled flux compliance is required, you would connect the EF mode controllers here instead, making sure that the input connector is connected to the light source ports. Connect the 850nm cable to the power meter as shown. The power meter will begin to show the light level coming in through the 850nm reference cable. To verify if the reference cable is good, set the power meter to ‘dBm’, then check the power level. For 62.5/125um, the power level should be around -20.00 dBm, and for 50/125um, the power level should be around -23.00 dBm. If the power readings are significantly lower than these power levels, then consider replacing the patch cable. Press and hold the ZERO button to set the 850nm reference. The display will change to read 0.00 dB (instead of dBm). Now, connect the 1300nm cable to the power meter as shown. At this time, the display will begin to show LO. On the power meter press the wavelength button, and on the light source press the PORT button until both of the displays read “1300”. Also, press the UNITS button to change back to dBm. The power meter will begin to show the light level coming in through the 1300nm reference cable. Again, check the power level. For 62.5/125um, the power level should be around -20.00 dBm, and for 50/125um, the power level should be around -23.00 dBm. If the power readings are significantly lower than these power levels, then consider replacing the patch cable. Press and hold the ZERO button to set the 1300nm reference. The display will change to read 0.00 dB (instead of dBm). At this time, both wavelengths have been “zeroed out”. Disconnect the mandrel-wrapped light source reference cables from the detector port. Also, switch both units back to 850nm. Now, this would be a good time to cover some key points about optical references. Perhaps the most important factor in ensuring the accuracy of any loss measurement is to ensure that the reference level stays the same. First, disconnecting the light source from the light source ports could change the alignment of the connector in the source, or introduce more or less debris. So, do NOT disturb the connection to the light source ports. And, unwrapping the cable from the mandrel will allow more light through the patch cable. So, do NOT unwrap the cable from the mandrel. So, to ensure the highest level of accuracy, make sure that you keep both of these things in mind, at least until all the fibers have been tested. If the reference cables need to be replaced for some reason, then you will need to re-zero the test equipment. Connect the mating sleeve (3) to the end of the light source cable (1), then connect the power meter test cable (2) between the mating sleeve and the power meter detector port. The power meter will show the loss of the power meter test cable and the adapter. The lower the number the better, but ideally, the loss of the combination of adapter and cable should be less than 0.5 dB. If not, try replacing the patch cable and/or adapter. Remove the mating sleeve from between the light source reference cable (1) and the power meter test cable (2). Please note that the power meter will either show the word “LO” or a very low power reading while it is disconnected from the light source. With test cables still attached, take both units to opposite ends of the link. Please note that it does not matter which end to take the devices since the testing direction has no bearing on the amount of loss. The power meter will continue to show the word “LO” or a very low power reading until it begins to receive optical power from the light source. It is most convenient to test all the fibers at 850nm first before moving to 1300nm. To do so, connect the power meter cable and 850nm reference cable to the first port to be tested. At this time, the power meter will re-establish its connection to the light source, and will display the optical loss in dB. Record this value if necessary. This loss value will be used to determine if the fiber is “good or not”, so the user will need to know how much loss is acceptable for this fiber link, or at least how to calculate the link budget. If the power meter still shows LO or a very low power reading: 1) verify the polarity of the fiber link; i.e. transmit going to receive, etc. Some fiber links may be installed “straight-through”, where Port 1 on side A goes to Port 1 on side B, but some could also be installed “crossed-fiber” where Port 1 on side A goes to Port 2 on side B. or 2) the fiber could be bad, at which point troubleshooting steps should begin; i.e. clean&inspect, visual fault location, re-termination, and possibly OTDR testing. Repeat this step to test all of the fibers at 850nm. Once all the fibers have been tested at 850nm, disconnect the test cables from the fiber link. Now, press the wavelength button on the power meter, and the PORT button on the source, to set both units to 1300nm. Connect the power meter test cable and 1300nm reference cable in to the first fiber under test. At this time, the power meter will re-establish its connection to the light source, and will display the optical loss in dB. Record this value if necessary. This loss value will be used to determine if the fiber link is “good or not”, so the user will need to know how much loss is acceptable for this fiber link, or at least how to calculate the link budget. If the power meter still shows LO or a very low power reading: 1) again verify the polarity of the fiber link; i.e. transmit goes to receive, etc. or 2) the fiber could be bad, at which point you would begin troubleshooting steps. Repeat this step to test all of the fibers at 1300nm. |
|||
 |
 |
| All prices on this website are shown in US Dollars (USD) |